How To Set Up your Marketing Email
So you read part 3 of our Marketing Series, Talk to Your Guests – It’s as Easy as an Email, and are ready to set up and send your first marketing email? Congrats! And don’t worry, it’s not as daunting a task as it may seem. Here’s your how-to guide to make sure you don’t miss any steps. We’re using Mailchimp but this list applies no matter what platform you’ve selected.
1. Define your goal
Before you start creating content for your e-newsletter, decide what purpose you want the email to serve. This will help make sure the emails you send are offering something focused and valuable to your audience and dictate the metrics you use to track your email’s performance later on. Do you want the email to notify your customers about a new promotion or special, promote an event, encourage people to order takeout or make a reservation, drive traffic to your website, or build a connection with your customers?
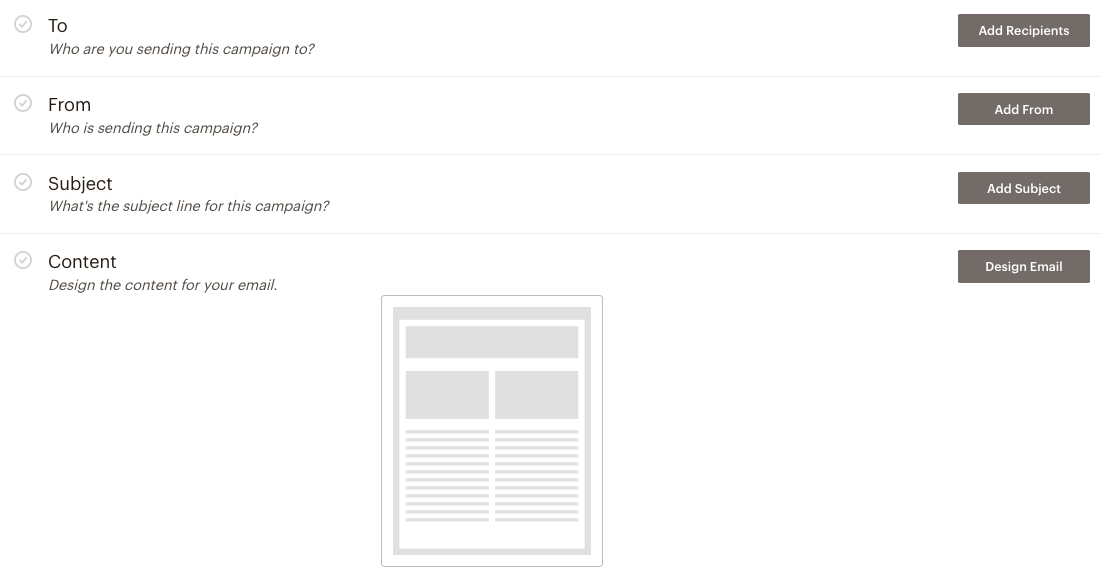
2. Gather your content
Decide what content best reflects the goal of your email. Resize images to 600 pixels wide for the best chance of displaying well in every email client and screen size. Try to use live text for the majority of your email (rather than one large image) to improve deliverability and avoid getting sent to spam or promotions folders.
3. Choose a template and populate
Most email platforms will provide an assortment of email layouts to choose from or even designs that you can then adjust to reflect your brand. Select the layout that best reflects the content you plan to include, and populate the template with your images and copy.

4. Craft your first impression
How your email appears in someone’s inbox plays a large role in whether they will open your email or not. Your first impression consists of your sender name, subject line, and preview text.
-
- Your sender name could be the name of your business, the first and last name of you or someone working at your business, or a combination of the two.
- Keep your subject line short and sweet – under 60 characters is best. Craft something eye-catching, intriguing, or informative to entice recipients to want to read more.
- Most email clients limit the amount of preview text shown, so don’t put any important information in this space, but use it to give recipients a preview of what to expect inside.
When in doubt, run a test! Send half of your audience one version of a sender name, subject line, or preview text, and send the other half of your audience another version and compare open rates afterwards.
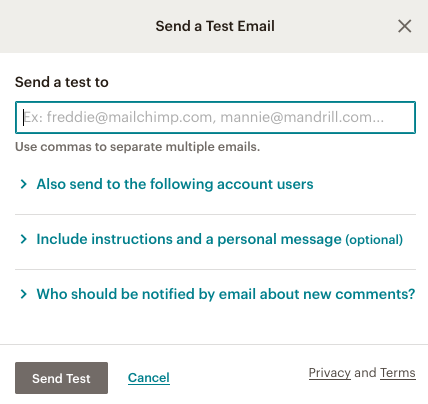
5. Don’t forget to test
Before sending your email, most platforms will allow you to send a test message to yourself. This step is critical! Send one to yourself and double check all content and links before the email goes out to your audience.
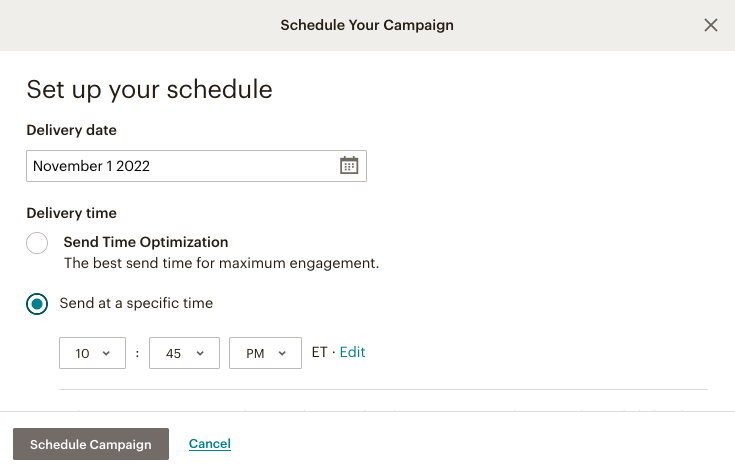
6. You’re ready to send!
Once you’re happy with your test, you’re ready to send your email. Most platforms will allow you to schedule it to send at a later date or time if you wish. First, check that the correct audience list is selected. Then, set the date and time for the email to send if you are scheduling.