Social Media Marketing For Your Restaurant Brand: How to Create a Facebook Page
As foot and vehicle traffic is down and digital traffic is up, potential diners are more likely than ever to find their next meal by browsing social media than passing a restaurant’s physical doors.
The more present and engaging your brand is online, the better your business can target and connect with potential guests who are looking online for great restaurants in their neighbourhood to dine with.
Here’s how to get your establishment on Facebook.
GET STARTED TIP: If you haven’t before, create a personal Facebook account on www.facebook.com. Personal accounts are required even if your main intention is to have a business page as personal accounts are assigned as “administrators” of the business pages.
The Set-Up
Visit facebook.com/pages/create. There, you’ll start by filling in the most basic information such as the page name, which should be your restaurant’s name, the page category (select “Restaurant”) and a description of your business. This could be a Facebook user’s first introduction to your restaurant, so make that description pitch count!
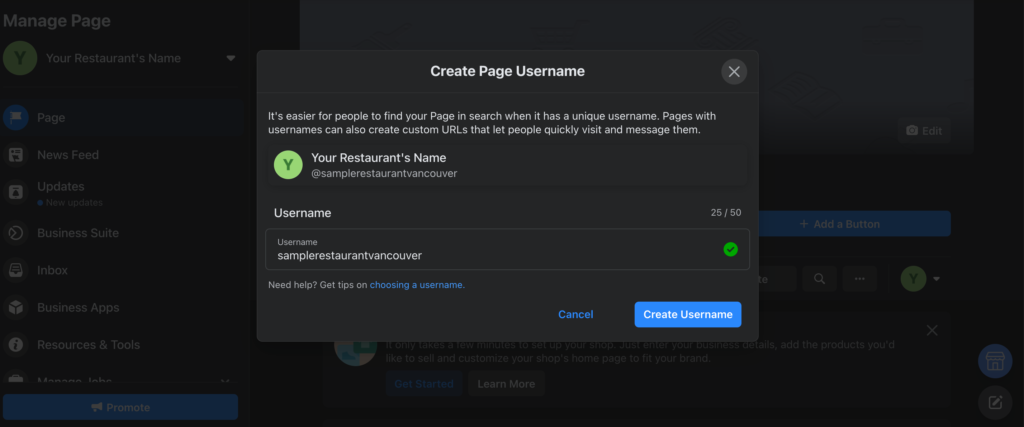
Create your URL/Username
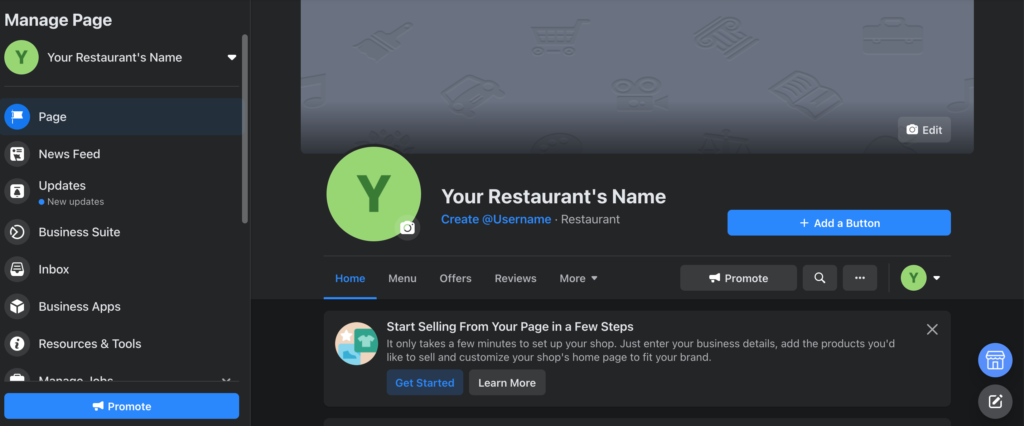
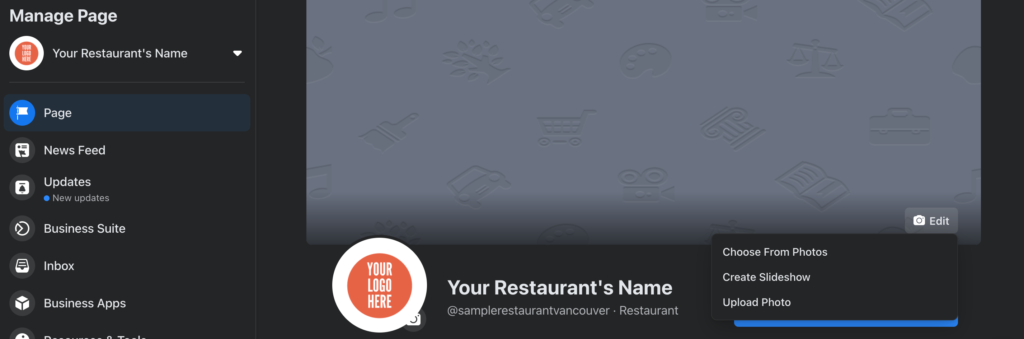
Once the page is set up, you’ll be taken to a management page that looks like this.

Under where your restaurant’s name would be, in our case here “Your Restaurant’s Name,” you see a Create Username button. This username will be automatically embedded into your page’s URL, making it www.facebook.com/UsernameYouCreate.
Try to make your username as close to your operation’s name as possible for easy searching and memory. If your restaurant name alone is not available, consider making your username restaurantnamecity or, if your city has well-acknowledged neighbourhoods, restaurantnameneighbourhood.
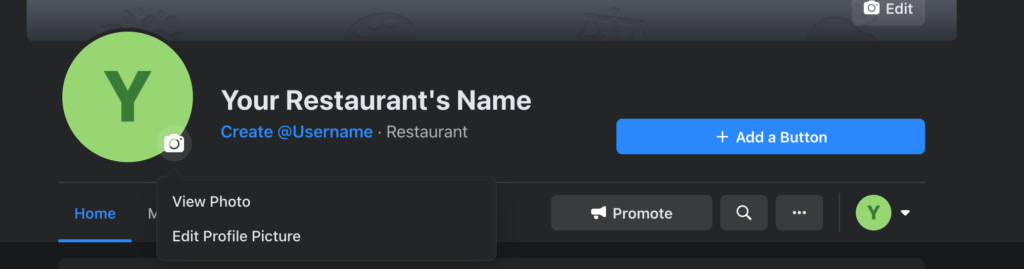
Add Logo & Imagery
Next, going back to the management page, you’ll see an image circle next to your page’s name. That’s for your logo! Click the camera symbol to upload your restaurant’s branding.
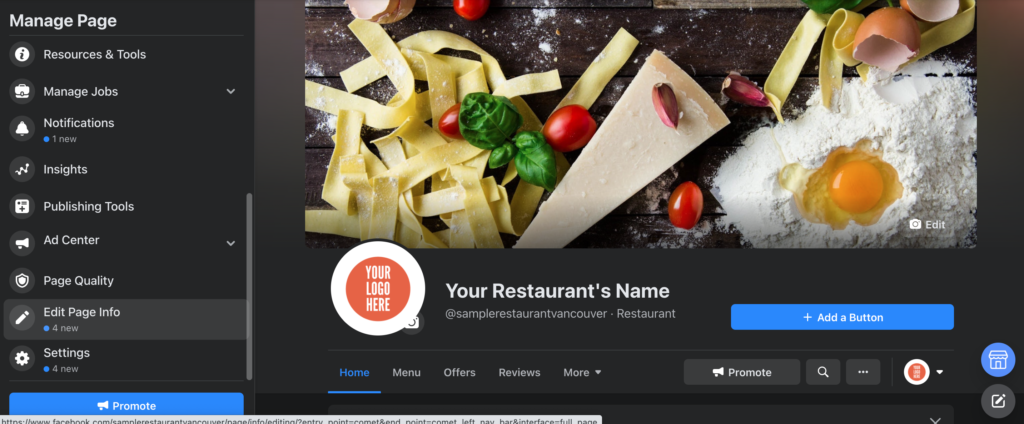
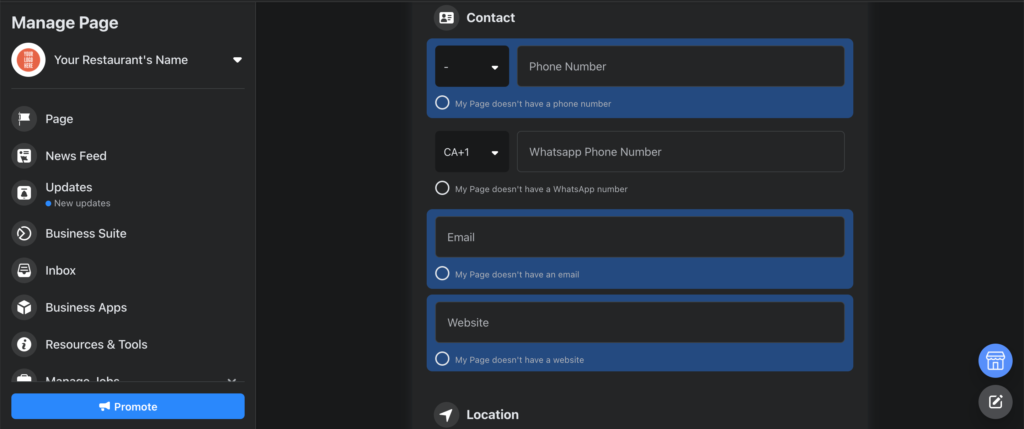
On this page, enter details such as your business’ website, contact number, location(s), service area, hours, temporary service changes due to COVID-19, price ranges and links to other social media accounts.
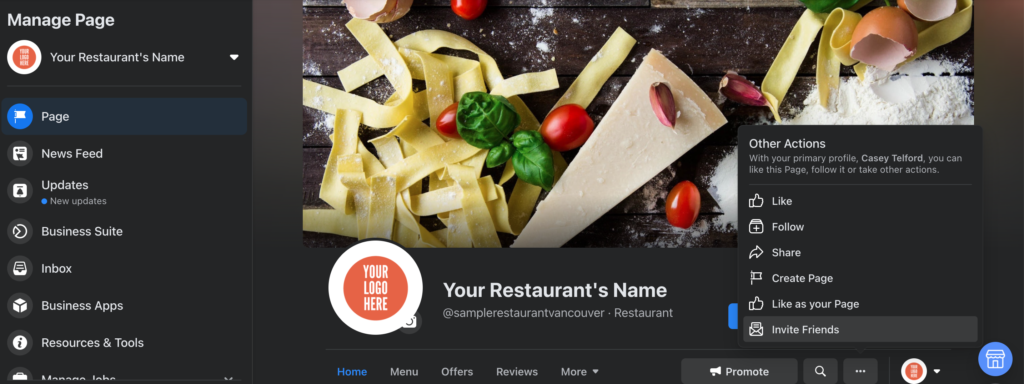
Invite Your Network
Now that your business is online, it’s time to tell the world, starting with your own social circles. Click the 3-dotted button under your page name (to the right) and select Invite Friends, to invite those you’ve already connected with on Facebook to follow your page.
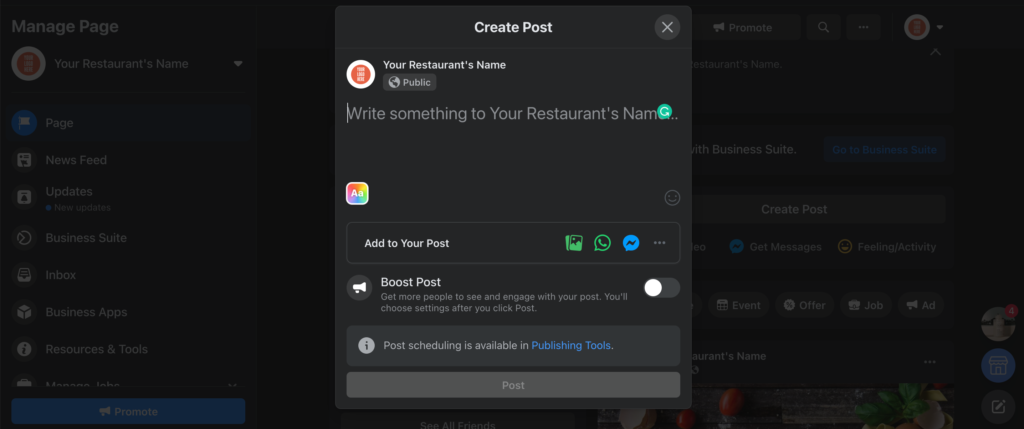
Create Your First Post
Whether it’s today’s special, a formal introduction to your community or any other major announcement, create a post on the main page to be shared with your audience.