
Social Media Marketing For Your Restaurant Brand: How to Create an Instagram Account
More often than not, when a potential diner is looking for a new place to eat, they’ll check online not only for locations but also menu selections and food pictures. After all, people eat with their eyes first and want to know that what they’re about to be served looks as delicious as it sounds.
Help customers find you and your menu offerings with ease by hosting an active Instagram feed. Here’s how.
Sign Up
On desktop, visit www.instagram.com. Or, on mobile, go to the App Store (Apple) or Google Play (Android) and download the Instagram app.
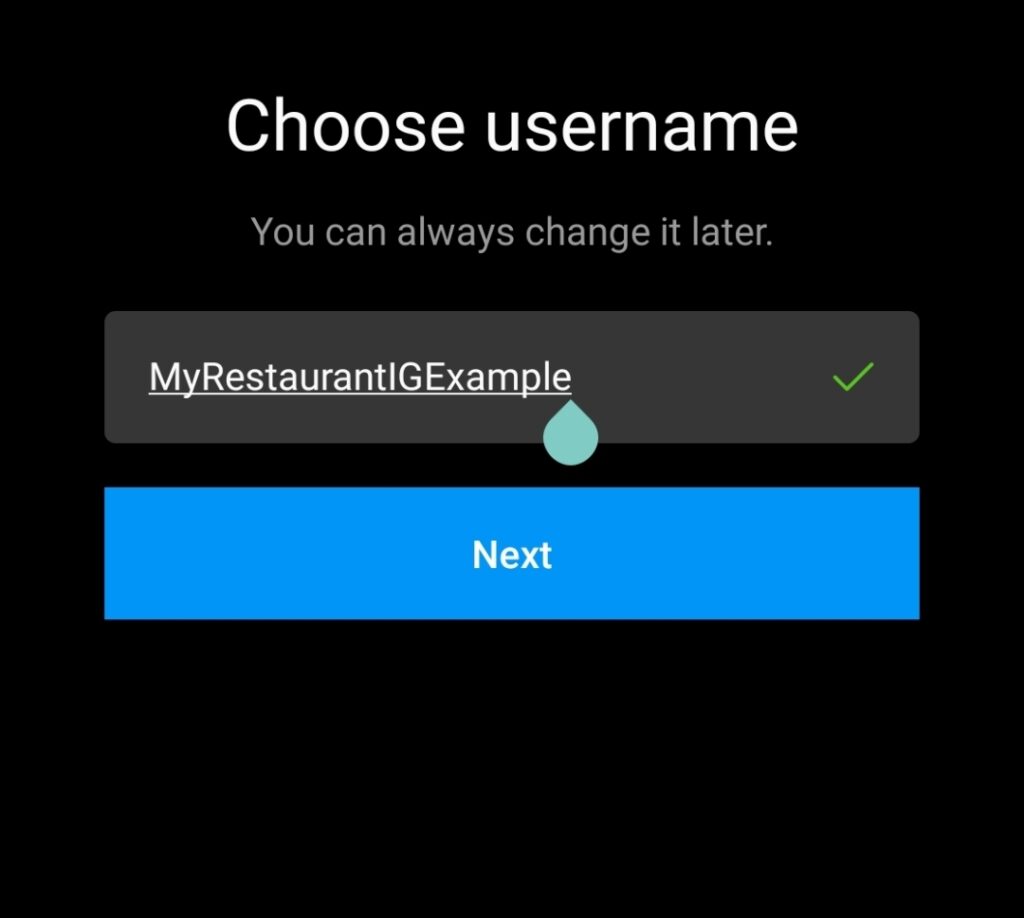
Once downloaded, you’re going to create an account, starting with selecting an available username. Get as close to your business name as possible, adding something familiar to the end like your city, if need be, if the restaurant name alone is already taken. Avoid using unmemorable characters like random numbers.
Then, you’ll be prompted to create your password. Write it down somewhere trustworthy.
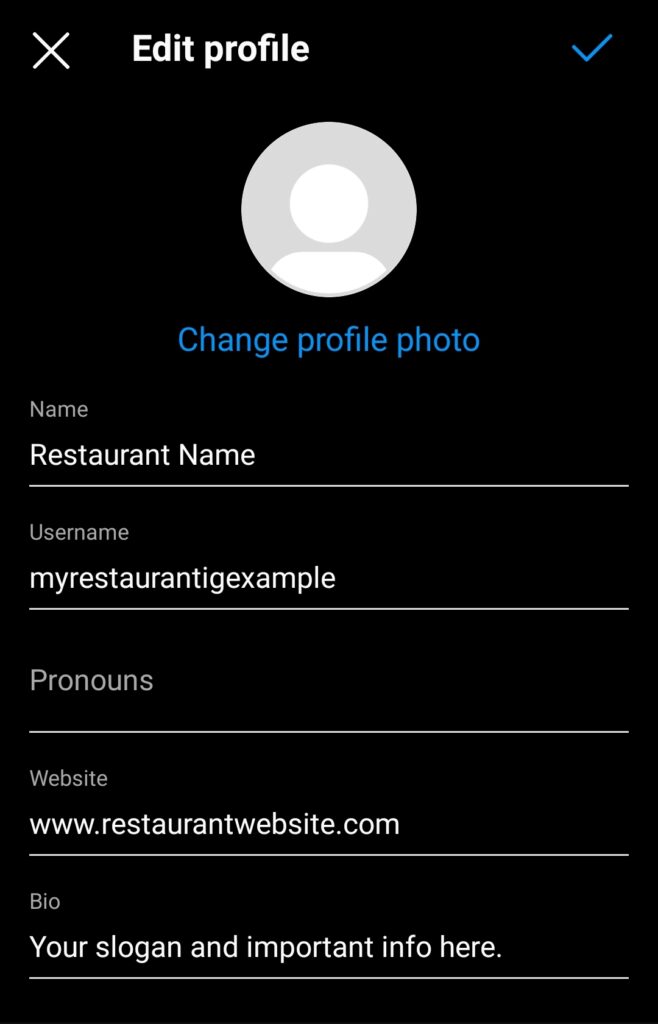
Next, you’ll be prompted to add a profile photo. This is a good place to put your official logo.
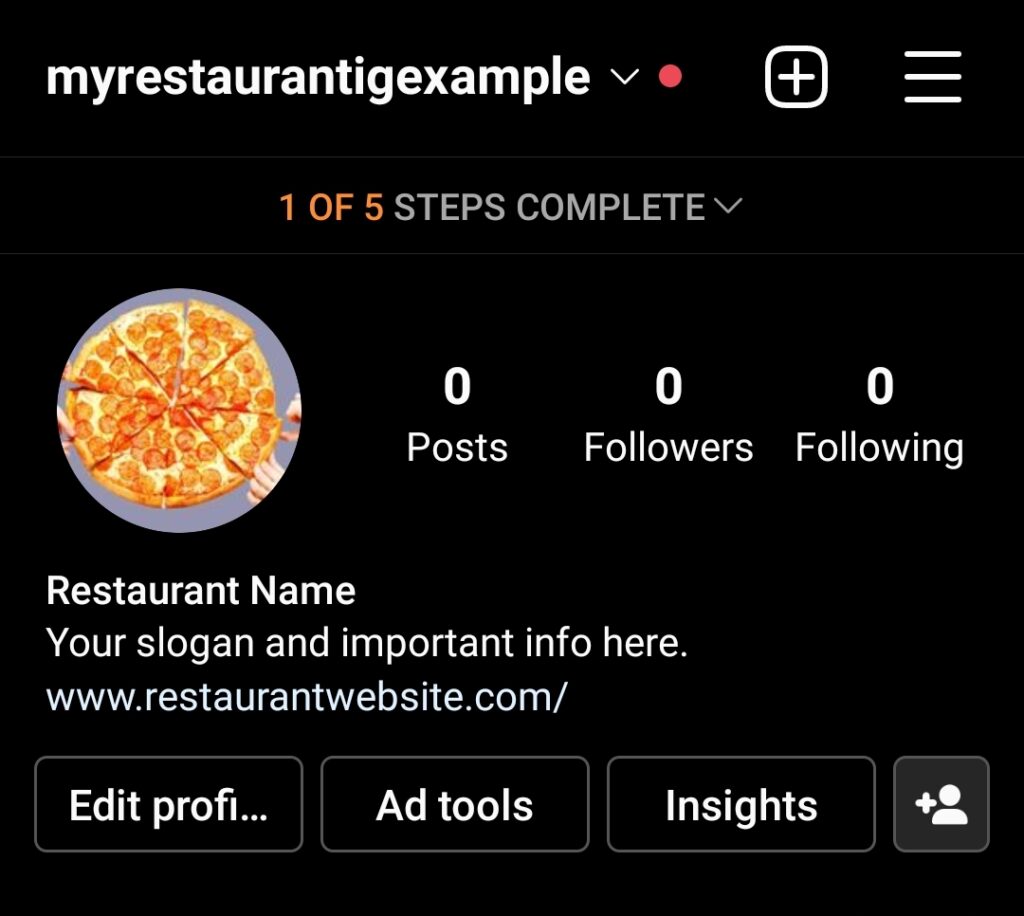
Fill Your Profile
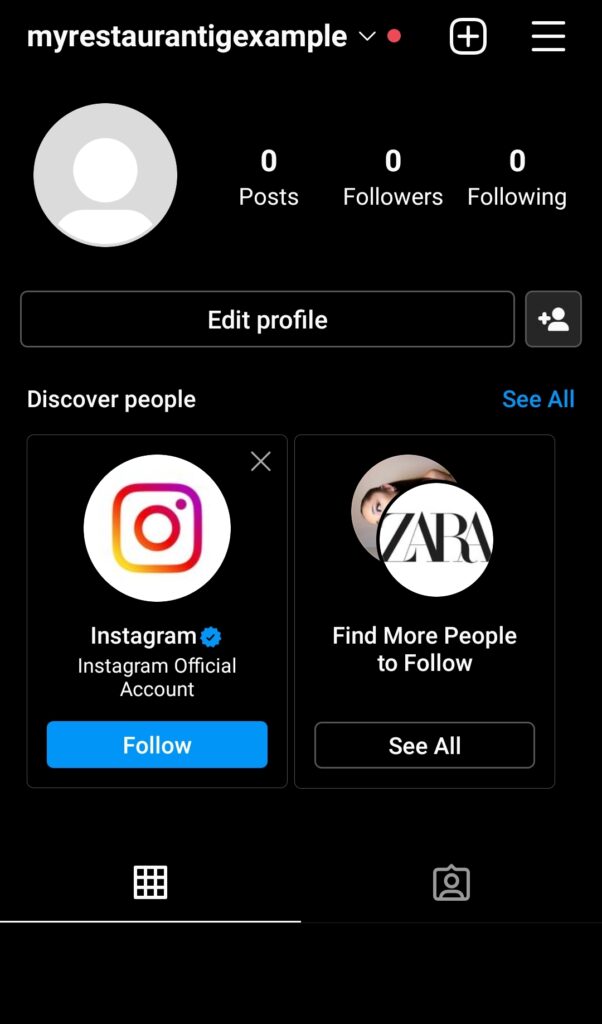
Now you have an account with an empty feed and an empty profile. On the bottom menu of your screen, tap the button that is your profile picture to head to your profile and tap “Edit profile” to begin filling in the important public details including your bio, website and contact information.
Personal to Professional Account
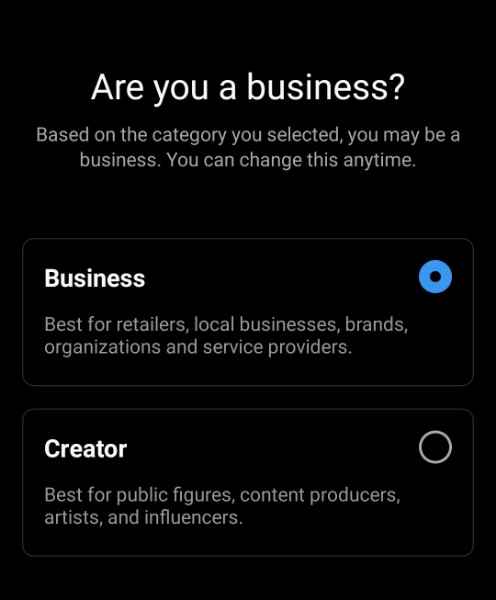
Below these profile editing entries, you’ll also be given the option to “switch to a professional account”. This is recommended as it gives you valuable features including added contact options for other users and business account insights (followers, engagement, demographics, clicks, etc).
Congratulations, you’ve created an Instagram account!
Whenever you’re ready to share a great photo, just tap the + button on the top right to begin!
Want to also learn how to create a Facebook page for your restaurant? Click here.
